
DIY Projects
DIY project: Dipped pine cone wreath

DIY project: Dipped pine cone wreath
DIY Projects
DIY project: Dipped pine cone wreath
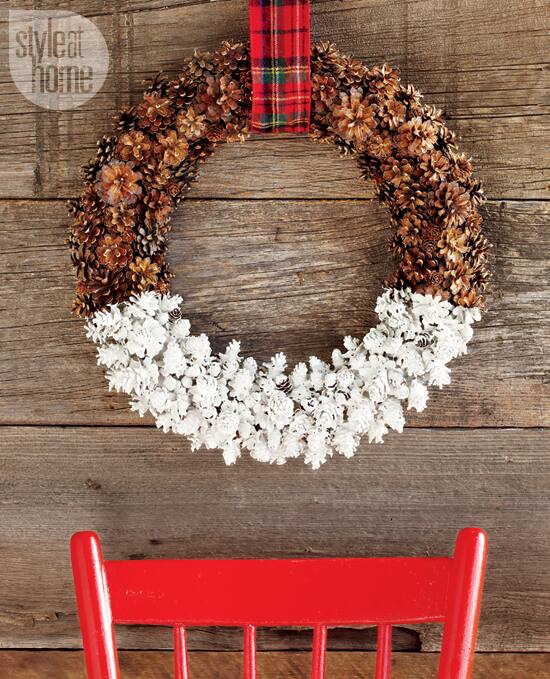
Our managing editor and resident crafter
Catherine Therrien shows you how to create a rustic
pine cone wreath with a modern twist – dipping half of it in
winter-white paint for a snow-covered effect that will have your home ready for the holidays.
Materials
Instructions
1 Spray paint three-quarters of the Styrofoam wreath brown and let fully dry. Leave the remaining quarter white.
2 Using a piece of wire secured to the base of the pine cone, dip directly into the paint can. Once completely covered, attach the other end of the wire to a rod and let drip dry into a paint tray. Repeat this process with a selection of different-sized pine cones. Let fully dry. (Note: When pine cones get wet, they have a tendency to close up, so you may need more than you think.)
3 Using a glue gun, adhere the unpainted large- and medium-sized pine cones to brown-painted section of the wreath, holding each in place until the glue hardens. Use the small pine cones to fill in any gaps.
4 Finish with the white-painted pine cones using the same method described above.
5 Hang in a spot indoors with a pretty ribbon.
Materials
- Brown spray paint
- 16" Styrofoam wreath
- Wire
- 50 large-sized pine cones
- 100 medium-sized pine cones
- 30 mini pine cones
- White latex paint
- Rod
- Paint tray
- Glue gun
- Ribbon
Instructions
1 Spray paint three-quarters of the Styrofoam wreath brown and let fully dry. Leave the remaining quarter white.
2 Using a piece of wire secured to the base of the pine cone, dip directly into the paint can. Once completely covered, attach the other end of the wire to a rod and let drip dry into a paint tray. Repeat this process with a selection of different-sized pine cones. Let fully dry. (Note: When pine cones get wet, they have a tendency to close up, so you may need more than you think.)
3 Using a glue gun, adhere the unpainted large- and medium-sized pine cones to brown-painted section of the wreath, holding each in place until the glue hardens. Use the small pine cones to fill in any gaps.
4 Finish with the white-painted pine cones using the same method described above.
5 Hang in a spot indoors with a pretty ribbon.
Comments